Black and White Conversion
If you’ve ever tried to convert one of your images to black and white, you’ll no doubt be familiar with the “greyscale” option in photoshop and other editing tools.
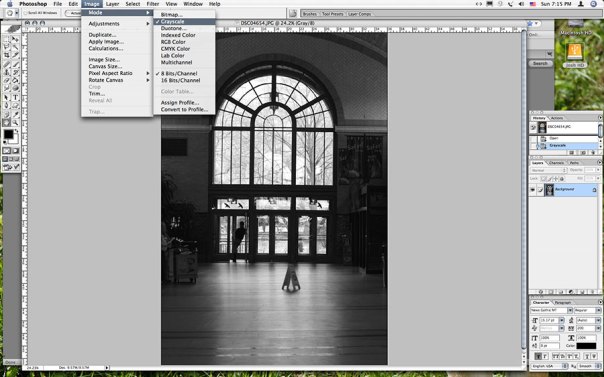 If you’re like me, you have no doubt found this option to be dull, uninteresting and prone to a flat, lifeless result. For this tutorial, we will look at one of several ways of accomplishing a black and white conversion apart from the greyscale option.
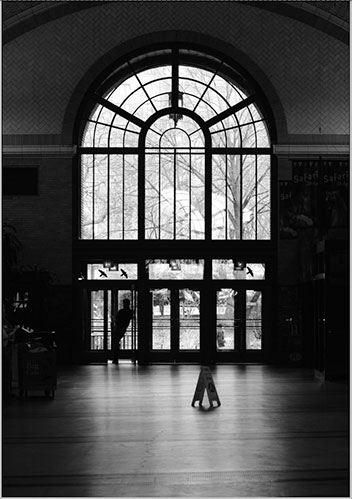
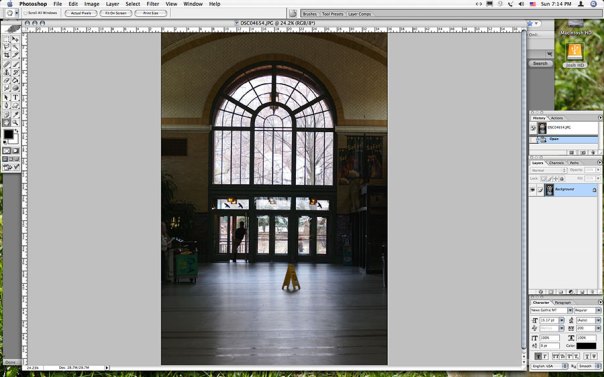 For this tutorial, I have chosen to work on one of my images from the “Cat house” in the lincoln park zoo in Chicago. It has good geometry, and should lend itself to a decent conversion. Something that works especially well in black and white images is that ability to show contrast, in depth, lines and symmetry. Ironically this is also an area that proves to be especially difficult to master as controlling the contrast midtone point of the image is so easily messed with indirectly. I will show you how to control this, though ultimately it will be subjective to your goals.
If you’re used to using the greyscale conversion, you have no doubt figured out that it will work best when converting an image that is already rather monochrome, or having little variation in colour. This technique becomes especially handy for images that have more variation as it will give you the ability to control each colour individually.
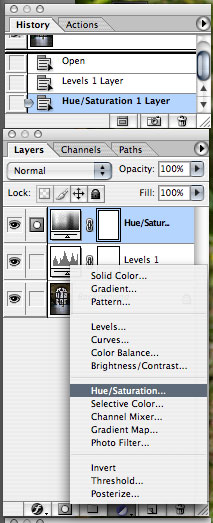 My first step when using this process is to create two new layers in photoshop, with the saturation layer on top of the levels layer. The order is important. Any changes made to the levels layer will effect the image you’re working on, while the saturation layer will then suck all the resulting colour out of it. With that said, be sure to open the saturation layer and set the saturation level to -100 by sliding the middle slider all the way to the left.
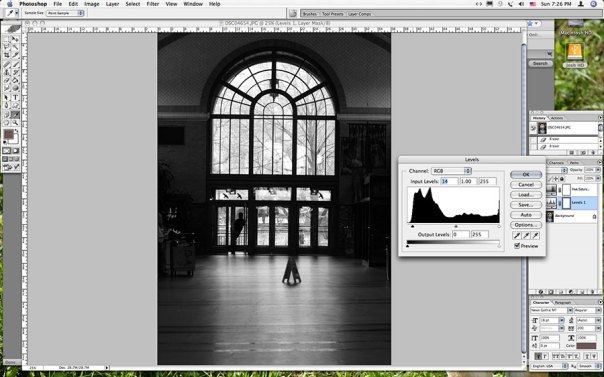 Now with the saturation taken out of the picture, you can open the levels layer and adjust each of the colour tones individually by moving their contrast points (the middle triangle on the slider). While I am here, I will also drag the black point (the left triangle) in a little to clean up some of the blacks on all of the channels. You’ll notice the drop down menu next to where it says channel. This is where you can access the different colour channels. If you’re working in CMYK you will have even more control here. Just for fun, you can hide the saturation layer and you’ll see a very different and often unnattractive image. What you are in effect doing is controlling the amount of red, green or blue in the picture. This will allow you to creat definition between these colours that wasn’t there before.
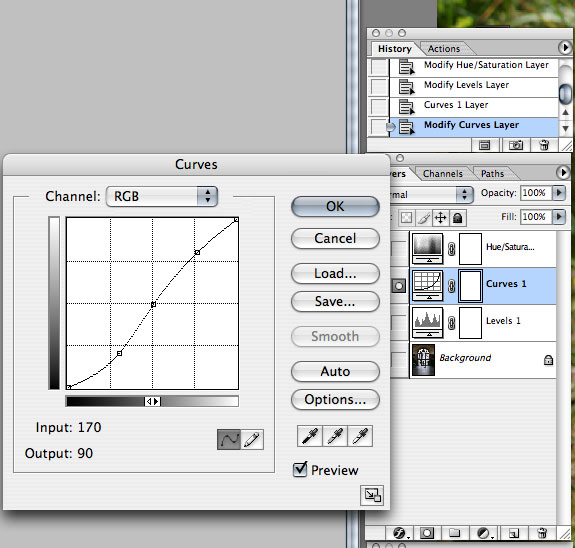 Now to control the tonal range of the image, I add a curves layer. Some software does not have a curves adjustment, including some photoshop elements programs. In that case, you can creat a similar effect by using the brightness/contrast layer, though you do not have as much control. On this curves layer, I am using a slight “S” curve, that will drop the dark areas darker and the light areas lighter. You can see the midpoint of the curve is the contrast midpoint. I haven’t moved it because usually I am able to get it right in the levels stage. In this case, I did want to bring the midtone up a little, and to do that you simply drag that point a little to the right or left if you want it darker.
As you may have guessed, this technique is all about controlling the contrast point for the tonal range of the image. This is in effect controlling light fall off as it approaches the shadows. For a good black an white image, you really want to use as much of the spectrum of light as possible, with clear white, and deep blacks taking place in the same image. It’s how the light travels in between that is lots of fun.
For more fun, try making copies of the finished image and layering it at different brightnesses with different blending options. You’ll find that soon you might want to erase parts of the upper layers to create new effects. Most importantly, have fun!
-Josh Laverty-
All images are the sole property of Flutter Photography Services and may not be used or circulated without the express permission of it’s owner.
I really enjoyed reading your article, keep up making such interesting stuff!